
Saturday 29 October 2011
Sunday 2 October 2011
MAG run 25th September
Some will argue it was a waste of time as very little new coverage was to be had. Down near me the local news people covered it reasonably well even explaining correctly the reasons. Which is rare when it comes to the press!
The actual run went well but there were a few incidents where the cagers thought they would bulldoz their way thru several hundred bikes which wasn't gonna happen in their wildest dreams! They just got surrounded and slowed to a walking pace for a few miles, myself a spotty youth tried to off me by pulling into the middle of the road as I passed on my way home, not sure what he thought he would achieve but rode alongside his open window until the glow of the his red face became to much! Then a couple of white van men wanted to play sandwich the biker but the all powerful ol-syd just kept them at 15mph for a while once in front.............twats!
The actual run went well but there were a few incidents where the cagers thought they would bulldoz their way thru several hundred bikes which wasn't gonna happen in their wildest dreams! They just got surrounded and slowed to a walking pace for a few miles, myself a spotty youth tried to off me by pulling into the middle of the road as I passed on my way home, not sure what he thought he would achieve but rode alongside his open window until the glow of the his red face became to much! Then a couple of white van men wanted to play sandwich the biker but the all powerful ol-syd just kept them at 15mph for a while once in front.............twats!
Sunday 28 August 2011
The new background
Ha! as I get accused of being away with the fairies I thought I'd have this background tickles me sense of humour!
No more hassles with the bike no leaks odd rattle sound from front when at idle but disappears when pull front brake on! nowt loose so difficult to pin down...we'll see, summit will fall off or go bang! Ha Ha! sorry try not to do lol ................bugger!
No more hassles with the bike no leaks odd rattle sound from front when at idle but disappears when pull front brake on! nowt loose so difficult to pin down...we'll see, summit will fall off or go bang! Ha Ha! sorry try not to do lol ................bugger!
Wednesday 27 July 2011
First ride with different tank
I definitely sit "in" the bike now! I like it and no leaks, shame I forgot to fully tighten the front brake lever mounts, and rode home using only the back brake the last 3 miles or so, still made me pay attention !
Sunday 3 July 2011
New Tank
Fitted the new tank today... sort of OK looks a bit more "chunky" and the bars look better with it than I expected.................more miles before fill up mind so something is better!


Monday 20 June 2011
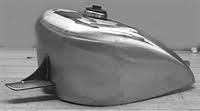
Tank
Tank arrived friday by sunday in primer and first coat of metallic getting used to it's look on the bike hopefully lacquered by weekend
Friday 10 June 2011
Why?
Well, having done about 160 miles with no problems mechanically why would something so small cause so much hassle? Petrol tank leaks from the cap, new rubber seal, two rubber seals, new cap, new rubber seals (you getting the picture!) hammered it, bent it, cleaned it, swore at it ............... then ordered a new tank.
Reason, the old one has the bayonet fitting seems to be a bit notorious for leaking or hassle at least, or I could only put a gallon in and push it around right hand corners! cos it doesn't leak going around a left un!
But the real disappointment is I have had to go back to a sporty tank, so ordered the low tunnel "Frisco" style, which will change the overall style.. bugger! Also as I do not have welding gear it will cost almost the same as a new tank to get the old one modified with new cap and bung. Plus this one holds about a gallon more so I will at least get off my estate before I need to fill up!
Friday 27 May 2011
150 miles in
Teach me to say the fuel cap would be an easy fix!, wasn't vented so needed to drill the hole!
Rideability: getting used to chucking her about after years of 8" overs and 18" ape's!
Tuning: sorted, plugs are the proper shade of beige minor tweeks in the mixture was needed, no problem vibes upto 80, mpg around 45 not bad but mostly pootling around 60 ish with odd excursions to 80 whilst overtaking combined mway and town so pretty fair I reckon given the engine mods.
Modifications: The side saddle bag is a god send for work.
Overall: oil tight, no loose nuts, rides well, plenty of interest on the streets so happy!
Saturday 21 May 2011
On the road again
To quote canned heat! ol syd is fully road legal taxed, MOT'd and insured. Done about 30 miles tweaked the carb a little and enjoyed the sunshine!
I might not be on here for a while because even if I take the "rapture" into account I will still be riding around somewhere with a stooopid grin.
It has been an interesting 11 months ripped skin and sore knuckles to name a few things. But I have finally built my own bike, and nothing has fallen off yet ha! MOT guy said the pipes were loud but as it was a sunny day etc etc. so I suppose will need to look at them sometime over the next 12 months only problem so far is the petrol cap leaks a bit which hasn't done the fresh lacquer much good got a small line down from the cap so need to sort a better sealing washer does look a bit flimsy. But wont take much to fix.
Thanks again to all those who helped with advice and skills
cheers me dears
Tuesday 17 May 2011

Saturday 14 May 2011
This is the end let the fun begin
Well I wasn't sure if this would happen, self doubt and crap life brings sometimes I let it get in the way! I have said before that I have been dreaming about riding my own custom since I was about 12 the late sixties! But now at the tender age of 55 I have done it, not the 70's chop that I dreamed about as a boy, but what is now called a "Lanesplitter" it seems to have come from the east where some amazing bikes are out there in Japan. but it is gathering speed in USA and hints of it in UK.
I think it is a reaction against the mega buck, look at me bikes of the past few years, which I for one did not like. I can understand and admire some of them but throwing money at a builder then riding around like your the squirrels nuts doesn't cut it. Amongst my ambling's on the intetnet I came across a blog which headlines as "if you bought it aint a custom!"
My bike was built in my garage, the welding of the hardtail was done by Twizzle (down Dorsetshire way) as he puts it. A kind soul near me did a couple of brackets and mounts, I can gas weld but the cost was daft so my thanks to those two people for helping out. The rest was done by me, bending ally for brackets and boxes and trays, drilling holes, filing and filling and painting was all done by me, not in any fancy paint booth or workshop, but a true back street build, I learnt loads made many mistakes along the way. And much thanks go out to the guys and gals of Britchopper Forum who indulged my wierdness and daft questions, I feel that I have made some good friends.
The old gal (well she is 17yrs old ) will undoubtedly change some more over the years, I am already gonna change the paintwork come this winter, and there must be a better way to wire so many wires coming and going from the front really annoys me. Mostly due to the law saying I have to have this or that, but it doesn't mean that I have to like it. Maybe I will find away to run them through the frame, I am glad I didn't do it this time as I have made many mistakes.
What would I like to change or upgrade? paint, the electrics, a bigger rear wheel 18" or just an Avon Classic smr 500 would be cheaper! some new pipes, the Krome Werks AR are good but I want stainless ones showing the welds functional not pretty! and maybe's one pipe down each side, or trumpets.!!! You know what I mean!
First ride was interesting! 21" up front made bends and roundabouts a tad embarrassing till I sussed it out! Chains stretch quite a bit when new! Rigid frame with 3" seat springs are more comfortable than lowered swingarm springs odd but true for me anyway. So need to sort MOT and road tax and I'm off to the Alton to Basingstoke road for chill out ride
Pictures below aren't perfect but I was nearly out of sunshine but the smile on my face is still good !


Sunday 8 May 2011
Thursday 28 April 2011
Garage Gremlin
I should have left well alone yesterday! put things down just so they could move themselves to god knows where when my back was turned! fitted light switch all working nicely gently fitted them into the bars for them to go bang when switched on, started her up only for the throttle cable to break! arrrrrhh!
Monday 25 April 2011
I can smell the tarmac!
Now the race is on! only the lights and brake lights to wire in, number plate ordered, new switch and connectors on there way, wires in frame for brake lights and number plate lights, so BH delays permitting I just need to hook them up and tidy the loom.
So can someone pray to the god of rain and request that he/she/it remains on holiday long enough for me to take a spin round the block before the rain remembers to come back to good ole blighty!
So can someone pray to the god of rain and request that he/she/it remains on holiday long enough for me to take a spin round the block before the rain remembers to come back to good ole blighty!
Sunday 24 April 2011
Spaghetti
Errr? the blue one's connected to the errr

Honest guv this is temporary when it all works I'll make it pretty !
Indicators
Wired the indicators up looked fine, except they flash to fast! the relay is supposed to be for LED's on checking it is! So WTF is going on? posted a diagram of my wiring on Britchop and replies stated the diagram is right. then perchance someone said are you sure they are all LED? And guess what the ones at the front are not, they were bought as LED so had no reason to doubt, (one nil to evilbay) Got a new front set of LED's (I checked this time!) but I had knackered the relay, ordered a new one and all was well.
Today I spent a wonderful hour fishing in the frame to run the wires for the number plate light, that was fun...............not! Have the same to do for the brake light switch.
I am waiting for a new micro switch as I managed to knacker it (learning all the time!) so only the lights and brake light switches to finish and we're done.
Friday 15 April 2011
wiring, get a move on!
Spent an hour looking at wiring the neutral and oil warning lights, so I would get it right. It looked simple, so off I trotted today to the garage sorted wiring for the two idiot lights and did as the diagram showed!... yep life aint that simple! Oil light came on turned the old gal over and it flickered so far so good, no bloody neutral light twhat so ever, yes it was in neutral! The switch for the neutral light is behind the front sprocket cover, which means removing the rear master cylinder releasing the brake pedal and probably the front exhaust damn! Nothing I tried made it come on, so after a cuppa I went back to start the dismantling. fortunately (here's the tip of the day!) after removing the rear master cylinder and brake pedal the three Allen bolts and loosening the exhaust mount nut the cover slipped down sufficient to see the neutral switch, huge sigh of relief! and with the aid of a light and some long nose pliers removed it and fished it out between the gap. checked that the wire wasn't broken. the problem was the neutral switch appears to need its own power supply. Still not convinced but as I had hooked it into the power to the oil light and it didn't work! With its own power works fine! I am not using the OEM wiring loom so perhaps that is why. Still its working and that's another step towards the road!
Wednesday 13 April 2011
Wiring the worst
Below the reason I now understand that people hate wiring! plus spent about 4 hrs filing a square hole for the micro switches, still that should be the worst of it running the wires through the handlebars would have been simpler if I gone for standard apes but that wouldn't have been so much fun threading it all through the bends and corners ha!


Sunday 10 April 2011
Another step towards the road!
Bracket made for speedo, spent about an hour pondering and decided that the bracket needed to be on the top yoke big enough to be seen over the bars, which would free them up to drill between the risers to allow the wiring to come thru the bar bottom and onto the frame. No big deal except that I hadn't tapped(?) a thread before and only had one chance at getting it right or I would bollox up the yoke (expensive mistake!) so took almost as long as the decision to do it! but it worked out and I am pleased with the result sits nicely just behind the bars.


View from the back, still not happy with seat needs to be smaller, one thing that was wrong but couldn't make out what it was, the gap between seat and mudguard is fairly large because of the drop off to rear axle. It wasn't till I posted on Quadcambastards that it was pointed out! need a sprung seat as my back will not take no suspension at all... so I reckon a smaller seat and a tool bag slung below seat should make use of the gap! only problem is my old tool bag finally fell to bits having spent 10 yrs slung on the bottom of the frame at the front!

Speedo in place, also doesn't look as busy with it in that position

View from the back, still not happy with seat needs to be smaller, one thing that was wrong but couldn't make out what it was, the gap between seat and mudguard is fairly large because of the drop off to rear axle. It wasn't till I posted on Quadcambastards that it was pointed out! need a sprung seat as my back will not take no suspension at all... so I reckon a smaller seat and a tool bag slung below seat should make use of the gap! only problem is my old tool bag finally fell to bits having spent 10 yrs slung on the bottom of the frame at the front!
Saturday 9 April 2011
every little bit .......
....counts towards the end! rear mudguard back on wiring from rear lights/indicators thru to electric box and live feeds to fuse box. Bracket made for speedo, which is being fitted to front of top yoke, this will enable me to run the wiring from the switches to the underneath of the bars then down onto frame.
Pictures tomorrow hopefully as I'm up the ladder clearing the guttering!
Pictures tomorrow hopefully as I'm up the ladder clearing the guttering!
Sunday 3 April 2011
Nearly there
Fired up and starting to look the part, at last! Lights and indicators next plus a damn good clean and a tune up for the engine.


Saturday 2 April 2011
Today I mostly be..........
Putting the backend back on! Plus apparently this style of bike is known as a Lane Splitter.
Thursday 17 March 2011
Sorted the oil lines today, yes I know the live lead is near the chain and the battery is near the tyre it's temporary honest! but hey they are on and used the old battery being massive for shaping the oil lines around and a short length of rubber pipe to take up the vibrations they run underneath into the rubber oil lines, as I have read a lot about pipes fracturing etc.
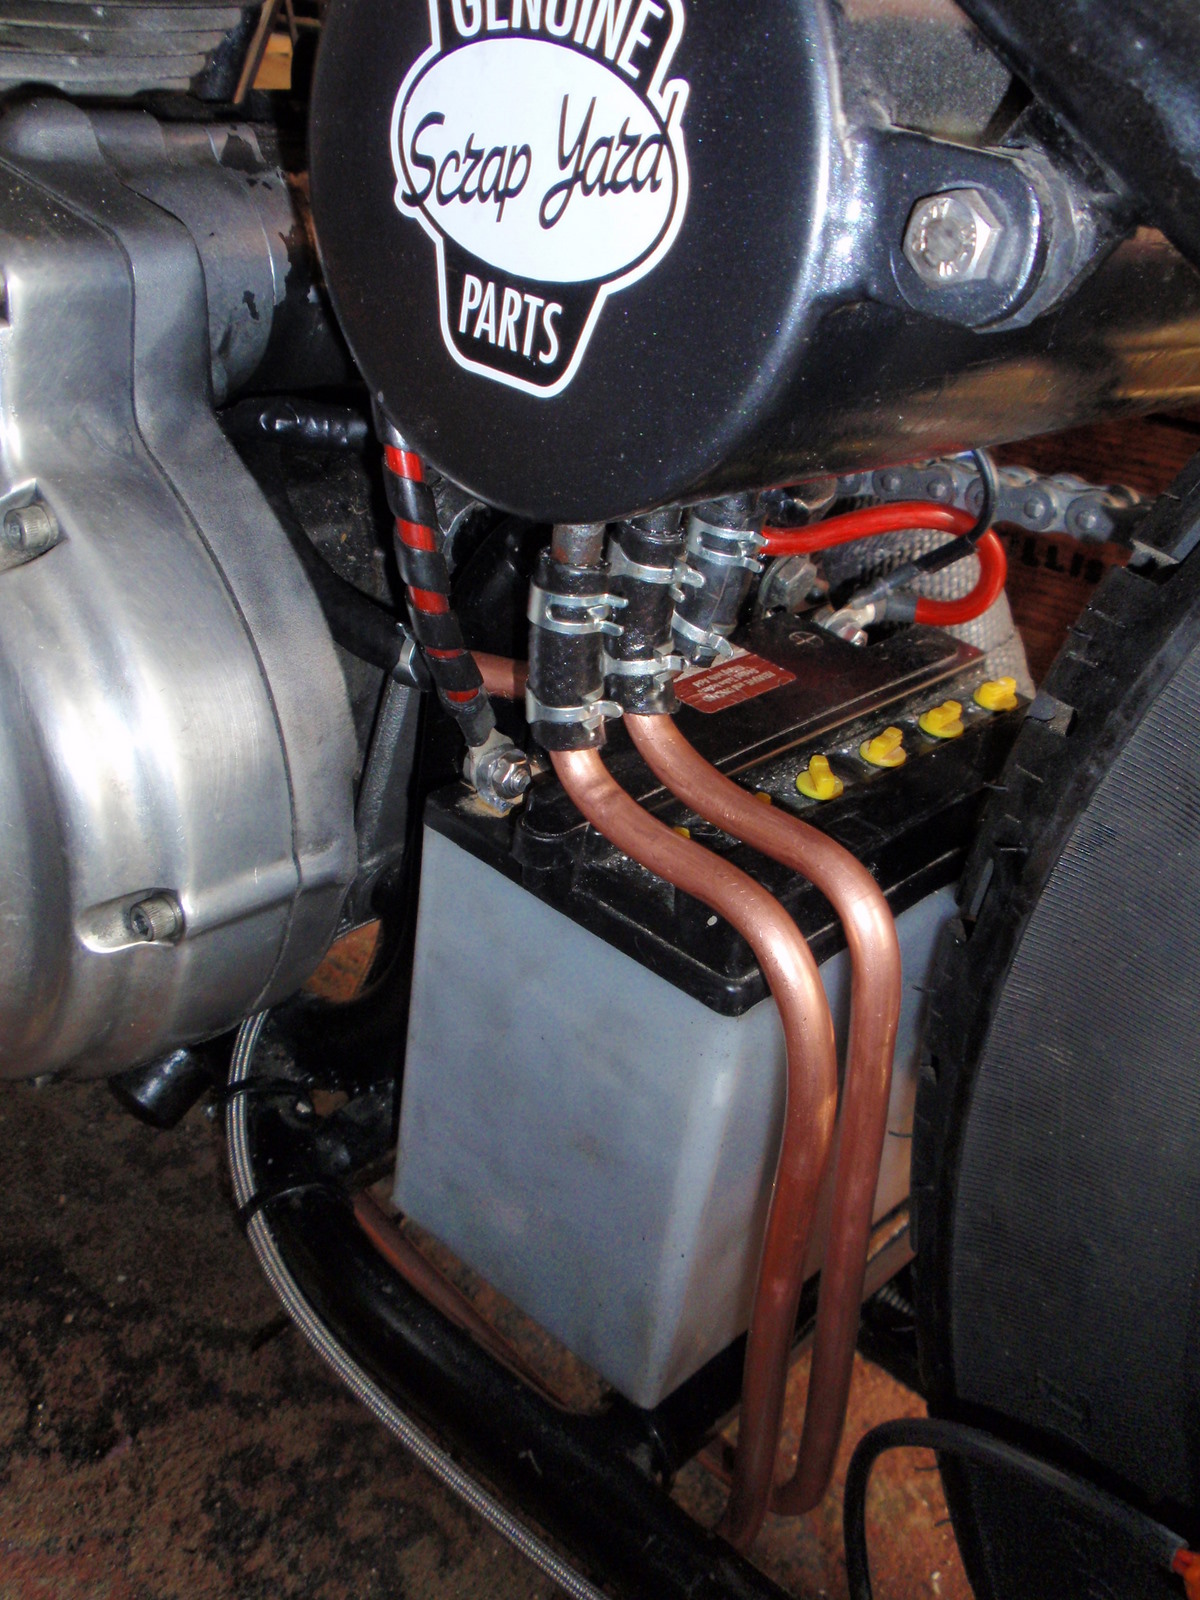
Seat returned to black so it looks better with the silver paint etc. This winter I will repaint the tins and might even have a go at using leather on the seat!

The box in the background is getting lighter as parts go on the bike! Just waiting on the battery charging so I can turn the engine over and suck that nice new oil into the engine.
Wednesday 16 March 2011
getting there
Will have to take a couple of pictures soon! recovered the seat with black vinyl, as I am leaving the paint alone or I will never get on the road this year. Drained the flushing oil out and going to put copper pipes on, but having a bit of a problem with the bending of. Cheap bender broke so got a better one but that seems to flatten the pipe at a 90 deg bend, tried all variations with some odd pipe but no matter how I tried still flattened the bend! I am going to have a go at it using an internal bending spring which should sort it, I need to bend the pipe so that it goes around the battery then under the chassis into the rubber pipe so about 3 90's. I was hoping to spiral one of the pipes but I think I will have run out of pipe practicing! Still there's always this winter! Once they are sorted rear wheel off sort the battery holder and widen the chain/frame clearance. Oh yeah repainted the rear mudguard and the new indicators, having broken one of them! so that is ready for re-mounting.
Monday 7 March 2011
Work commences
Well, having got the beast started, I can get on with the rest. Lesson one - put the rear mudguard on last! Spent half an hour undoing two bolts to detach the muddy as they were behind the oil tank! As it needed respray I have modified it so that the two bolts are now above the rail. The mudguard paint was not good enough some sanding lines had come through over the months, I have had nothing but trouble with it the tank an oil tank went fine but the muddy has been a pain for what ever reason! So spent Sunday afternoon sat at the front of the garage in the sun sanding it back to smooth! Quite enjoyable and peaceful.
When that is done the rear caliper carrier needs a bit of modifying courtesy of angle grinder and some files!
When that is done the rear caliper carrier needs a bit of modifying courtesy of angle grinder and some files!
Saturday 5 March 2011
Behold she started!
Well flippin 'eck as much it has only taken about two weekends of fiddlin re checking and rechecking wiring and everytime could not find any problems so tonight I thought one more check over with the multi-meter then ka boom blat blat blattery blat tune up time tomorrow then I can charge full ahead with sorting the rear end (somewhere along the line I managed to break off an indicator whilst she was covered up) plus change of paint scheme is required. and need a little more clearance on lower frame leg for the chain.
For the record I am one happy old sod tonight!
For the record I am one happy old sod tonight!
Sunday 27 February 2011
Bloody wiring!
Well, spent the weekend sorting the ignition system! thought I had it sussed but something wasn't right on investigation and looking at many wiring diagrams none of which had a starter relay, which I had kept and it was this that seemed to be causing the problem. So it went via my foot to the bin!
Checked the timing again, re checked the timing, then it nearly started but the starter seemed to jam, so recharged the battery and watched the rugby for a while!
Final insult, checked it all battery charged, fired her up well almost.............sigh............ then I noticed that my right leg seemed a bit damp, forgot to replace the timing inspection bolt oil was spouting all over me leg! So at that point, tomorrow is another day! Perhaps perhaps perhaps !!!!!!
Sunday 20 February 2011
Electrics part 2
Well today after a fair bit of head scratching and looking at about 5 different diagrams I got the bike turning over both on the direct start button and the key! It took me about 3 hrs but I needed to be sure having not done this before and didn't want to mess something up that could be costly!.
Lessons learnt, take your time check, double check then make sure you've checked! I had kept the original ignition circuit as it seemed to make sense it was a little complicated because the wiring colours were as per usual not as the OEM diagram! but by keeping the regulator, starter and alternator wiring which was already wrapped with a strong covering complete with plugs etc seemed to make sense. I made two new battery terminal leads as the OEM were both black positive having a bit of red tape to denote positive. So I went for a length of red covered lead for the positive, no mistaking it is live, and used the same red (old black one had had it, having just moaned about OEM!) but I had some black plastic spiral binding cable cover left over from previous "mods" but it definitely is negative with a little red showing through!
Having wired it all into place temporarily with longer wire than needed (in case of cock ups or mods needed) I tried the direct start then the switch all turned over nicely and left it all attached for 30 mins no hot wiring or smoking so I guess all is well.
I will check all is in the right place one more time, as in the charging system all looks right and power is where it is needed. Then shorten wires where needed and fix permanently run a live wire to the fuses for lights, indicators, horn etc. and add the Hi4 ignition to live wire in the VOES and thats the main part finished. Hopefully in the next few days! The Crane Hi4 is a dream for the amateur, plug and play as near as damn it, wire to live, 3 to the coil, VOES and tacho if used done, simplicity to tune the engine as well, with the aid of a small led light.
I have run the bike without the VOES the past year and on "race" setting. There are arguments that go on deep into the night over the VOES and whether its use is relevant or not. The main reason for putting it back in the system is I have not been able to get the tuning quite right with the S&S super E, and much research has been done to get an answer. However, a good few people seem to think that you will get a slightly better fuel consumption and smoother running in the tuning department. So until I can get the bike into a tuning station I have switched the Hi4 to VOES upped the rev limit a little to about 6k and will see what happens! The fuel consumption will be a bonus as my new tank only holds 2 gallon! and with a rigid rear end I don't expect to be riding at a ton that often!
Well after sodding around with the VOES and the thing not starting once it was fitted properly took it off returned to race setting fired up first time!
Saturday 19 February 2011
Got started on the electrics today, I have about 4 different wiring diagrams that each show different ways of doing the job, little consolation!
I have to get this bit right and it worries me that I might knacker something so treading very carefully! All wiring is temporary and on the long side so it looks a mess, I have kept all the old wiring which I have found helps as well. First problem was there is three terminals on the starter but could I find the third after much hunting and looking through the manual I finally found it, a spade terminal UNDER the starter solenoid! which attaching was fun consisting of a torch, long nose pliers and patience! why would you put a terminal under something that has about 1" between it and the engine and in complete darkness? Anyway that sorted I found the starter relay and the 30amp circuit breaker and wired them in. So far so good I now just have to run the live feed from the battery but in the right place. I have sorted the VOES and where to mount it just need to run the Hi4 ignition wire to it and ground it.

Next job is run the live feed from battery hook up the Hi4 and VOES and see if the old gal will run. This is major hurdle for me as wiring lights,horn and indicators are simple and the worst that can happen is a blown fuse. Oh yes and sort a multi point earth or fuses will blow!
Thursday 3 February 2011
Getting back to it
Well, it's been a few weeks (OK probably months!) what with freezin weather and household DIY having to take precedence, but I will get back to the business in the garage on poor old syd (17yrs old this March!) who has lain languishing under a mound of old sheets, T shirts, and rags for a while.
But it was a good thing as not being able to work on the old gal gave me time to rethink a few parts and slowed me down (to eager to get it finished means shortcuts or bodges!) So hopefully this weekend I can get to grips with a few of them and tidy up, first will be the rear brake calliper it fits and does the job but could look a whole lot better, the seat needs to be made smaller far to wide for the overall skinny look I am trying to achieve, get the ignition live, start up then fit copper oil lines along with some decent oil, and make a new speedo bracket will do for a start.
Before and after pics will show what I mean hopefully!
Subscribe to:
Posts (Atom)